Note: This walkthrough isn't thorough about looking at absolutely everything and choosing every dialogue option in every conversation; it mostly just describes important actions and dialogue choices needed to solve puzzles and advance the plot, with some not-strictly-necessary actions taken for context. It also doesn't try super-hard to be absolutely the most efficient path of walking around the geography. Future versions will include some of the more easily overlooked amusements and notable Easter eggs, but generally speaking, you're on your own if you want to dig deeper into all the many jokes and things to see.
The least aggravating controls for me playing on PC keyboard are using the arrow keys for movement (right hand) + Shift to run (left hand) instead of WASD or click and drag with the mouse, but YMMV.
Chapter 1: Launch of the Screaming Narwhal
Defeating LeChuck
(Bet you didn't think that's how you'd start the game, was it?)
Take the recipe paper that's pinned to the mast. Talk to Elaine. Go up onto the quarterdeck (where the ship's wheel is) and pick up the monkey coffin. Open your inventory and examine the coffin to find a bottle of root beer. Combine the root beer and the cutlass; you'll discover that the stuff has gone flat. Combine the breath mints and the root beer to make a soda geyser joke that maybe seemed a little more relevant in 2009. Combine this refizzified root beer with the cutlass. After you drop the bottle, talk to Elaine again. Ask her to throw you the rope.
After you shimmy across the fallen boom (?), look at the barrel of grog. It's not root beer, but you can work with it. Look at the plant up near the bow of the ship. Cut the roots with the cutlass. Put the root in the grog barrel to make "root grog", then add the breath mints to make it fizz. Use the cutlass on the barrel, then use it on LeChuck. Unholy THIS! Watch the scene.
Washed Up on Flotsam Island
Talk to Nipperkin. (If you feel like what you actually say doesn't match the dialogue option you picked, or that no matter which dialogue option you choose, it comes out the same, you're not alone. This does improve in later chapters.) You'll learn that the winds always blow inward to Flotsam so no one can sail away, he's got an informant named Deep Gut, and he wants to write some good pirate news stories.
Try to go into Club 41. You'll learn you need a membership card. Talk to Nipperkin again outside the Keelhauler building. Ask him what kind of pirate news to make. He'll suggest a bar fight, seizing a ship, and finding buried treasure.
Go west. Follow the boardwalk past the courthouse and go down the path that leads through the archway into the jungle. Take the lower of the two paths leading west. Talk to the portly pirate sitting on the ground, Joaquin D'Oro. ("Davy Jones's Closet Organizer"? Okay, Mike Stemmle.) You'll learn that he's after a rare Porcelain Power Pirate called Dark Ninja Dave with Killer Katana. Ask if you can have a look at the map and he'll hand it over. Ask about the pile of pink dolls. Distract him with "Look, it's Dark Ninja Dave!" While D'Oro's back is turned, pick up one of the Pink Pajama Pierres.
Go west two screens. At the base of a tree you should see a pile of bombs. Take the bombs. Click the small circle on the bottom left of the screen to return to the jungle entrance, then exit the jungle through the archway. Go to the dock.
Making Pirate News
Go left around the dock until you reach a ship. Talk to Reginald van Winslow. You'll learn that you need to knock him off the ship to take it for yourself. Ask him about Club 41. Examine the socks. You'll find Winslow's Club 41 membership card. Okay, let's try getting aboard. Walk up the gangplank. No dice, but now there's a grease smear on the dock. Climb up the anchor chain. No joy there, either, and now the grease is on fire. Light a bomb from the grease fire. Put it in the frilly pink underwear. Use the clothesline (not the crank). Congrats, you've succeeded in seizing a ship!
Go to Club 41. Show the card at the door. Your Poxed hand will manage to immediately cause a bar fight, much to Nipperkin's delight. (Notice the voices saying "Me nachos!" and "Me cat!" You'll be hearing them both again.) Afterwards, pick up the broken grogatini glass lying on the boardwalk near the stacks of newspapers. Combine the grogatini sword with Pink Pajama Pierre. Dip this combined thing into the ink vat outside the Keelhauler.
Go west and leave the village through the archway. Go to Jungle Entrance. Go west to where D'Oro is sitting, then go north to a wishing well. Examine the map. Notice that it shows a hand putting the map into the well, and then pictures of various animals. Put the map away, then put it into the well as shown. The screen will vibrate. To navigate the maze, you're supposed to carefully approach the screen exits until you hear the correct sound. Fortunately this is not randomized, so from here you can go: east (pig), east (monkey), north (bee), south (monkey), south (pig), north (bee), and west (birds). You will hear a chime each time you change screens correctly, and a rumble if you make a mistake (which unfortunately means you have to start all over by putting the map in the well). At last you will come to a spot with a hole in the ground. Put your improvised Dark Ninja Dave in the hole. Leave the screen to the west.
Go to the Jungle Entrance, then west. Talk to D'Oro and tell him the map wasn't a rip-off. You'll lead him to the spot, where he'll dig it up. Cue Nipperkin to get the scoop on this finding of buried treasure. Now that you've made enough news, he's willing to tell you how to find Deep Gut and gives you a map with a password. Put the map away.
Go through the archway and to the Jungle Entrance. Per the map, go west and then north three times. You will reach a creepy shack. Knock on the door. Say "Deadline". Deep Gut is none other than the Voodoo Lady, once more having inexplicably come to a random island ahead of you. Talk to her. ("Satan's combover"? Okay, Mike Stemmle.) You'll learn about your major goal for the next few chapters: to find La Esponja Grande. When you're done, exit the conversation. Look at the rug. Look at the parrot skeleton. Pick up the pyrite parrot. Get the interesting bottle from the shelf in the foreground. (It's a somewhat blurry object sitting next to a skull with a candle on top of it.) Leave the shack.
Get the weather vane that's been knocked off the top of the shack. You will demonstrate its use, but you don't need to do anything with it right now. Leave the screen and you'll automatically return to Flotsam Town.
For Your Amusement
After lighting the bomb, hold onto it for a long, long time and repeatedly look at it.
In the Voodoo Lady's shack, repeatedly read the book titles.
Fixing the Winds
Talk to the glassblower, Crimpdigit. Ask about unbreakable bottles and he'll demonstrate his unbreakable bottle breaker. You can't take it with him standing guard over it, though. Talk to him again and ask about the Alphabet Sale. Say you'd like a free vowel. Go to the Screaming Narwhal and climb up the anchor chain. Van Winslow will come by and volunteer himself to be your first mate. Go down onto the deck. Pick up the cheese wheel. Fire the cannon. Exit the ship (click Exit while standing next to the gap in the railing). Go back to the glass shop and pick up the bottle breaker from the crate. Your unruly hand won't let you use it on the bottle yet, though.
Go left and up to the house. Get the flower pot hanging to the right of the door. Knock on the door. The Marquis De Singe will take you inside to investigate your diseased hand. Talk to him. Uh oh, you're in trouble now -- but at least the grog anesthetic he injects you with gets your hand under control.
Rotate the exam table so that you're facing to the right of the screen, then tilt backwards (up). Get the key from the table near your feet. Rotate left. Use the key on the cage. Jacques will catch it and free himself. Rotate left so you face the projector screen. Use the bell to make Jacques switch slides to a picture of the vole-powered generator. Tilt down and hit the right pedal. This drops a banana and makes Jacques go to whatever's depicted on the screen. Press the left pedal. This shocks Jacques (yikes! But at least he appears to enjoy it...) and can have secondary effects like his tail hitting other objects. Notice that the X-ray of your hand has been knocked to the floor. Rotate and pick it up. Rotate back to the projector, tilt back, and drop the picture into the basket of slides. Hit the bell and Jacques will put the hand picture into the projector. Tilt down and use the banana pedal. Jacques will jump to the bones, i.e., the skeleton where the key to the exam table is. Use the shock pedal. Now Jacques has the key in his tail. Tilt up and use the bell again. Tilt and use the banana pedal one last time. Jacques jumps to the pirate -- i.e., you. Ta-da! You're free.
Outside, use the bottle breaker on the bottle. Hmm... a blank scroll? That's not very useful. Put it away. Go east to the courthouse. There's someone new sitting here: Hemlock McGee, whom the Voodoo Lady mentioned (and whom you might recognize as the voice that said "Me cat!" during the bar fight). Talk to him about the winds and mention the scroll. ("Neptune's hangnails"? Okay, Mike Stemmle.) Choose any response you like about borrowing the Eye of the Manatee. Use it on the scroll. This is similar to the first map you followed to get to the treasure site, featuring animal sounds you're supposed to follow plus a few other actions, like checking the wind direction with the weather vane and putting a flower in a well. It's also not randomized, so put the map away. While you're here, use the wheel of cheese on the weird symbols on the side of the jail.
Go to the Jungle Entrance. Go north. Use the map on the altar. Go south (bee), west (monkey), north (use the weather vane), use the flower pot on the well, east (weather vane), west (bee), west (weather vane), walk around the disc counterclockwise, north (weather vane). You should arrive at the ancient portal just in time to spy on the Marquis leaving.
Notice that the portal has a crystal nose the same color as the unbreakable bottle. Use the bottle-breaker on it. Take the weird door face. Put the pyrite parrot in the nasal cavity. Leave and go back to the dock. Go to De Singe's house. Talk to him. Tell him you have proof he's up to no good. Watch the scene.
To turn the winds around, you need to get the statue to close all the finger-holes in its horn. Put the ancient tool (the "key" you took from the clamshell outside) into the clamshell. Use the weather vane on the mysterious idol that rises up. Use the idol. Spin the stone discs until the facial features match what's shown on the weather vane. Put the ancient tool in the clamshell next to the idol. After a rumble, one of the fingers will move. But the Marquis isn't too happy about this, and will blow you away -- literally. Leave the screen where you land. There's three more idols to visit, which are now marked on the map.
Go to the enigmatic idol. Put the weather vane in the socket and match the face. To replace the missing nose, use the flower pot on the idol. Use the tool in the clamshell. Again, the Marquis will blow you away. Leave the screen, then click the circle at the bottom left of the screen to return to the Jungle Entrance, and walk out to the map.
Go to the strange idol. This one is missing a wheel. Fortunately, you've brought a substitute: use the cheese on the idol. Use the weather vane on it, match the face, and use the tool in the clamshell. Return to the Jungle Entrance and walk out to the map.
Finally, go to the messed up idol. This time the Marquis has beaten you here. Distract him by saying "Look, it's King Louis!" Quickly use the U tube on the rifle. Look at the idol. You can't use the weather vane here (although you may find it amusing to try). Instead, rotate each of the wheels until De Singe makes pleased sounds (and try not to think too hard about what's happening that he could enjoy it). Use the tool in the clamshell. The winds have gone from suck to blow, and it's time to set sail for the Rock of Gelato!
Unfortunately, your Poxed hand has other ideas about you issuing this command to Van Winslow. Go up to the quarterdeck and use the wheel. The violent roll will knock over the tar barrel. Go back down onto the main deck. Fire the cannon, which smashes the barrel with its recoil and spills tar by the mast. Use the map. You won't be able to point to where to go, but when you punch yourself backwards, you'll land in the tar, trapping your disagreeable hand. Talk to Winslow, and this time you'll be able to tell him to make for the Rock of Gelato.
Soon you'll spot Elaine's and your ships... and Elaine! And LeChuck trying to get cozy with your wife. Great. But a certain pirate hunter's sword at your throat is a bigger problem for the moment...
To Be Continued
(Har har har!)
Chapter 2: The Siege of Spinner Cay
Fighting Morgan LeFlay
Whenever you talk to Morgan, the pair of you will move to another part of the ship. Talk to Morgan and ask how she got on board. That hook she mentions is still there, but you need to get to it. Talk to her again. Get the hook. Talk to Morgan to move back up to the quarterdeck. Use the hook on the cable. Cut the rope holding up the barrel of fish. Talk to Morgan again to until you get back up on the quarterdeck. Use the wheel. The barrel of fish will slide across to the other side of the ship. Talk to Morgan two more times to get back to the base of the stairs. Click on the seagull. It will fly up and pull a red herring out of the barrel, unbalancing the barrel so it can fall on the plank. After the scene is over, click on the map and set sail for the Jerkbait Islands in the upper left of the map.
The Vacaylian Summoning Artifacts
Follow the walkway around. You'll be greeted by one of the Vacaylians, Anemone. Work through all the dialogue. When finished, approach the royal chamber and you'll hear an argument going on which Elaine is trying to defuse. Elaine will run down to talk to you. When she's finished, use the statue standing next to the walkway and you'll get a glass fish eye. Go up the stairs. Talk to the MerLeader, Beluga. Ask about the cure and the summoning artifacts, and the raft. Elaine will give you a transit pass. When you exit the conversation, Elaine will say you two can't leave yet. When finished talking, exit the royal pavilion (click on the exit at the back). Take the path through the cave to the bait and repair shop. Take the bucket. Talk to Anemone and ask about getting your mast repaired. (Yes, why do you have Largo LaGrande's theme in your head?)
Go back down to the raft. Give the transit pass to Anemone. Use the raft. Go to Roe Island. Look around at De Cava's stuff. Put the locket in the hole in the toy manatee. Combine the Eye of the Manatee and the fish eye lens. Use this on the "blank" paper. Leave and get on the raft.
Go to Spoon Isle. You'll come upon two of McGillicutty's crew, Killick Hardtack and Murkel Trenchfoot, arguing about where to bury the seahorse artifact they have. Approach them and talk to them. Ask what they're arguing about. Say that there's a fair way to settle it and suggest a staring contest. Distract them with the last dialogue option, that points out something behind them (there's a variety of random things it can be). While they're both looking away from the chest, put the pyrite parrot in it. Now you'll be able to locate it even when it's buried.
Take the path into the forest. Go east to a well. Examine it. "Fishing" well? Huh. Get the coupon that's lying on the rim of the well. Go northwest, west twice, northeast, and west. You'll come to a clifftop where LeChuck is having trouble getting at another of the summoning artifacts. Pick up the coupon that's lying on the ground to the left. Leave LeChuck to his own lack of devices for now and click the circle at the bottom left of the screen to go back to the jungle entrance. Take the raft back to Spinner Cay.
Take the central walkway to the library. Talk to Tetra. Ask for a book and tell them you want 101 Fish Jokes. Examine it and you will find a coupon. Go up to the bait shop. Give Anemone each of your three bait coupons. Examine the oyster to open it and get a pearl.
Go back to the raft and return to Spoon Isle. Enter the jungle and go west, northeast, northeast, west to the cliff. Talk to LeChuck. Ask him how much longer he's going to take, and what he's carrying. Hmm, his "key" appears to be missing a part. Exit the conversation. Give him the pearl. Talk to him again and ask if he needs more help. Tell him to use the pearl with the claw thingie. Talk to him again (sigh) and tell him to use the MerFolk key with the clamshell lock. Use the key you're carrying with the other clamshell. Go over to the altar. (Notice the view: you're looking directly down on a dead end in a path.) Get the prying tool. Try to pry up the turtle with it. Give the prying tool to LeChuck. Watch out for that first step, it's a doozy! Watch the little scene with another of McGillicutty's crew plotting to try to take the turtle from LeChuck. Pick up the prying tool again. Go east. LeChuck will appear and hand over the turtle.
Go to the jungle entrance, then north and east to the fishing well. Combine the glowing bait with your hook and you will automatically fish in the well, retrieving the golden cranky fish. Return to Spinner Cay.
Go to your ship. Use the map and go to Brillig Isle (the small island in the top right corner). Walk left until you find the spot where the parrot is buried. You'll automatically dig it up, and the seahorse with it. Watch the cutscene with Morgan and De Singe. Pick up the coconut. Notice that it bounces off one of the trees -- it's not a palm tree, but a rubber tree. Get in the rowboat to go back to the Narwhal. Return to the Jerkbait Islands, where Spinner Cay is now under the titular siege.
For Your Amusement:
When helping LeChuck with the clamshell lock, try all the incorrect directions.
Under Siege
Go to the library and help Elaine, who's been trapped by a fallen statue. She'll explain her plan to get through the blockade. After she leaves, use the bucket to pick up the hot coals from the ground. Go up to the royal throne and take the control dial. Use the raft and go to Spoon Isle.
Go into the jungle, east, then northwest. You'll see LeChuck fending off three pirates who are trying to get him to give up the turtle artifact that he doesn't actually have. Go west. Examine the thing labeled "Vacaylian ruins?". Put the coals in it and attach the control knob from the hot tub. Turn up the heat. Put the pyrite parrot in the depression on top of the barbecue. You'll automatically take the dish full of melted pyrite. Quickly run west, northeast, and west to the clifftop. Use the bowl of pyrite with the cliff edge to pour it down into the turtle mold below. Return to the jungle entrance, then go back in and go west/southwest until you reach the dead end. Pry out the pyrite turtle.
Go back to the jungle entrance again, then north, east, and northwest. Give LeChuck the fake turtle. After the fight, the three pirates will go off with their "prize". Choose any dialogue option you like; you won't actually say any of them. LeChuck will go off to the beach to work the cannon. Go back to the jungle entrance and get on the raft. Sail to the blockade east of Spoon Isle. With the twin fire from LeChuck and Elaine distracting them, you'll be able to get between Trenchfoot's and Hardtack's ships and reach the Screaming Narwhal.
Use the map and go to Brillig Island, where you'll find Hardtack and Trenchfoot have somehow gotten here ahead of you, ready to dig up the artifact you already stole. Talk to Trenchfoot. "Can't find the treasure, huh?" Say you think it's poking out by the tree (i.e. the rubber tree), then leave them to it. Push over the rubber tree. Get in the rowboat to return to the Narwhal.
Go to McGillicutty's ship. Talk to him. After you've learned as much as you want about his plans, pick the dialogue option that taunts him, so he'll fire his cannon and break your mast. Sail to the Jerkbait Islands, which you can now reach again. Go up to the bait shop. Talk to Anemone and tell them you found a tree they can use to repair your mast. Exit the conversation and go back to the Narwhal. Sail out to meet McGillicutty again. Talk to him. This time, when you taunt him, the cannonball will bounce off your mast and he'll sink his own ship. Use the map and go back to the Jerkbait Islands.
Summoning the Legendary Sea Creatures
After a brief scene, tell Beluga you need to find La Esponja Grande. He'll give you a sort of ball. Go down to the end of the dock. Throw the summoning ball into the ocean and some seahorse-turtle-fish hybrid thingies will pop up. Tell Winslow that you're ready to leave.
Out at sea, Morgan will show her mercenary face again. Work through the dialogue. And soon you'll be working your way through the innards of a giant manatee...
To Be Continued
Chapter 3: Lair of the Leviathan
Guybrush and Morgan... Threepwood?
Go east and talk to Coronado De Cava. Mention the locket. ...Oops. Mistake. Well, now you'll have to convince him that Morgan is actually your wife. Go talk to Winslow. Follow his directions: Take Morgan's wrist (notice the tattoo of "Gus", and she mumbles, "this is for Jugbender"). Take her sword (notice the engraved name, Dante Dragotta, and she mumbles "Gomez, not on the carpet"). Pick up her boots and you'll find her accounting ledger.
Winslow will wish for some smelling salts. Go around the back of the Narwhal and up onto the deck. Shimmy up the mast. Look at the cochlea and the wound while you're up here. Get the stinky earwax. Slide back down the mast and leave the ship. For no reason, you will decide to check for the pyrite parrot and find it gone. (Apparently there was some back-and-forth among the devs, some of whom thought the parrot was fun and others hated it.) Use the earwax on Morgan. You'll persuade her to go along with the scheme. Tell De Cava that you met through work and that your first date was sailing. Gee, that was easy. Well, not so fast. Time for a real pop quiz! (So... how would De Cava know that Morgan's answers about you were correct?) You can work out or at least made educated guesses on many of the questions from the tattoo, sword, list, and first and second mumblings. Don't worry if you get an answer wrong; you'll merely have to start the quiz over.
Death of someone close to her... Jugbender
Favorite pet... Gomez
First love... Gustavo
Greatest idol... Guybrush Threepwood
Purchased a ship called the Knave of... Toro
Who trained her... Dante Dragotta
When you've passed, finish the dialogue about his crew and the manatee mating grounds. After a fun slide down the esophagus (I guess?) you'll meet the Democratically United Brotherhood of the Manatee Interior.
Becoming a Member of the Brotherhood
Walk down the ramp and talk to the surly pirate working out on an, um, organic punching bag. You can have him call a vote now if you like, but of course you'll fail. (If you do, you'll need to talk to Bugeye again.) Ask him about voting for you and you'll learn that you'll have to beat him a pirate face-off where originality of your moves counts. After Bugeye has had his turn, all you can do is repeat his Stinky Lazy-Eyed Meanie, so do so. Disillusioned, Morgan will toss away her signed picture of you.
Go back up to the bongo player. Pick up the little gray grub that's crawling in the background. Also pick up the picture of yourself that Morgan threw away (it's a little hard to see on the screen).
Talk to the bongo-playing pirate, Noogie. Say ARRR! to get a pirate face. Talk to him again and tell him you could use his vote. Offer to get him a date with Morgan. He'll give you a members' manual. Go talk to Morgan. Say ARRR! to get a face. Talk to her again. Bring up Noogie, then pivot to it being a reconnaissance mission. Tell her first to interrogate him, then test his grip, then check him for weapons. Success! You have Noogie's vote.
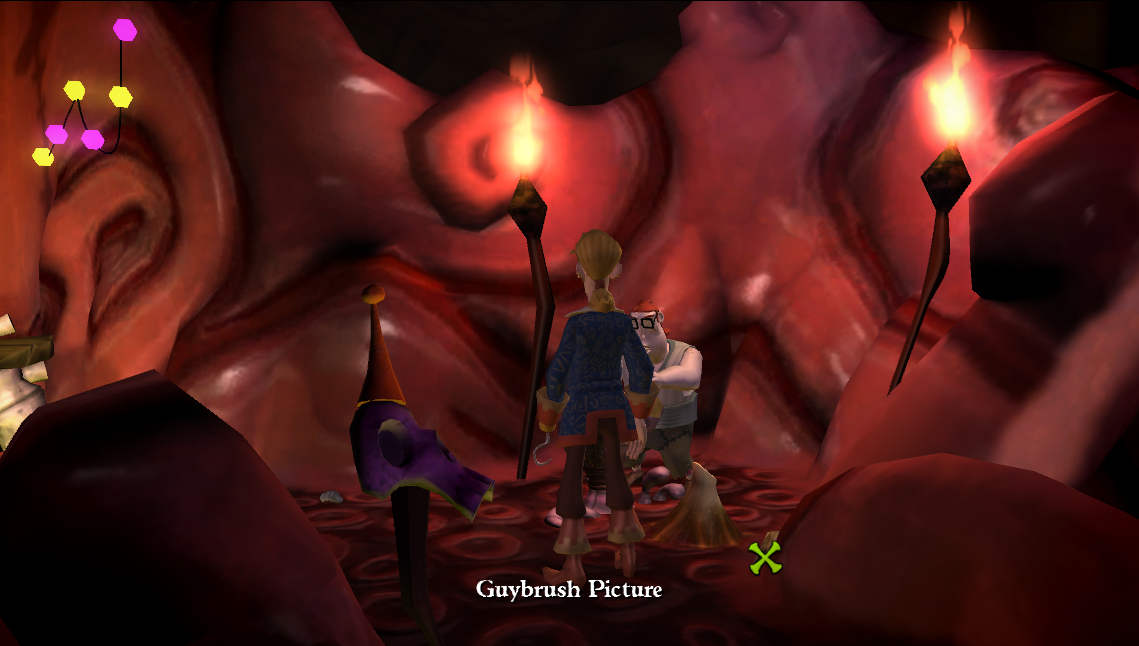
Go up to the mouth. De Cava will task you with bringing him some orange bile and give you a mug. Give him the grub you picked up. He needs how many?? Yyyyeah, it's time for plan B. Exit back to the belly. (There is actually game code to handle the event of the player bringing 99,999 more grubs, and what's more, you can actually escape the manatee this way. But of course, it's functionally impossible to do without tool assist. If you want to know, I suggest looking up a Youtube video.) Return to the belly and walk down the ramp. Go left past the pile of treasure. Hmm, that treasure chest sure seems angry... and familiar. Pick the lock with your hook. (A feat that totally, definitely would really work in real life.) Watch the strangely timed cutscene with De Singe. Open the chest. +1 demonic skull! Look at the figurehead of the shipwreck to get a new mouth for your repertoire of faces.
Notice the three things off to the left that look like miniature volcanic vents. Use the odd protuberance, but you'll find that the duct is clogged. Go through the weird bump. Tell Noogie to play something a little more uptempo. Go back down the weird bump. While the bile level is high, scoop some up in the mug (there's a spot under the duct in the back where you can interact with the bile pool). Pour this bile into the clogged protuberance, then jump into it. Now you'll come out by the statue that you couldn't reach before. Open the iron monkey. Combine the book you find with the DUBMI manual Noogie gave you and you'll swap the covers. Go back through the odd protuberance. Look at the painting. Pour the bile on the painting and you'll get a pirate face.
Go through the strange growth to the cantina. Talk to the bar pirate, Moose. Say ARRR! to get a face. Ask him about the funnel and about his vote. Propose a toast. While he's drinking, quickly cut off Santino's skull with Morgan's sword. Swap Murray onto Santino's skeleton. Talk to Murray. Ask about getting his vote. I'm sure this will shock you, but Murray is lying; if you call a vote now, he won't actually vote for you. Show him the torture book with the members' manual cover. Now he'll vote for you, and Moose will follow his lead.
Go back up to the mouth. Watch the scene with Winslow. Nice, now you have a decapitated seahorse head stowed in your jacket. Aaanyway. Walk over to De Cava's campsite. Wait for him to put down his monocular, and quickly swipe it. (First cartographers, now explorers? For shame, Guybrush.) Combine it with the Fish Eye of the Manatee to swap the lenses, then give it back to De Cava. Give him the mug of yellow bile, which he will now see as orange through his rose-tinted glass, and will accept. You'll get your last bit of pirate face this way. Exit back to the belly.
Walk down to Bugeye (or go down the strange growth next to the cantina, if you prefer). Challenge him to a face-off. He'll lead off with the Stinky Lazy-Eyed Meanie again. When you get your first turn, you'll be missing one from each set. You can choose whichever one of the other two you like. (To be sure of not repeating yourself, you may find it helpful to note down what you did.) Bugeye will use the missing Hooded, Crosseyed, and Geezer on his second turn. Choose the last unique set of four on your second turn. Success!
...Or not, as Bugeye has an ace up his sleeve, so to speak. Well, if you can't get even, get mad: tell him to give you his vote or he's a dead man. His obstinance sends you into a Poxed rage, with a scary face he can't beat. Talk to Bugeye once more and have him call a vote. Now you're in, and the proud (?) owner of a manatee cochlea. (If it's so important, why give this job to the most junior member of the brotherhood...?) Time for some immediate betrayal of your sacred trust. Go back up to the mouth, climb the Narwhal's mast, and restore the cochlea to its rightful place. Yeah, the guys aren't happy about that. Work through the dialogue with Morgan. Give her back her sword. Watch the scene.
The Manatee Whisperer
Underwater, pirate-paddle east to the cavern. AAAUUGHH!! EVEN MORE GIANT FEMALE MANATEE! Up top again, ask De Cava where Santino learned manatee language and how he made the sounds. Pick up the flopping fish from on top of the sack. Go up to the quarterdeck. Open the file trunk. Look at Noogie's file. Make a note of the funky face of Sister Agnes: a Stinky Crosseyed Geezer. Exit the file and the trunk. Go down to the deck. Talk to Morgan.
Now to find out who had the Tongue of the Manatee. To break Bugeye, talk to him and call him a scumbag. To break Noogie, talk to him, say ARRR!, and make the Stinky Crosseyed Geezer face. To break Moose, ask Morgan if you can borrow her sword, then use it on Murray. (You can do all this in any order, resulting in slightly different dialogue.)
Use the plank to jump overboard. Give the seahorse head to the male giant manatee and he'll swallow you. Put the flopping fish on Noogie's bongos. Go down the weird bump to the bile pool and pick up the Tongue of the Manatee. Pour the Manatee Lax in the bile pool for a quick (and, one hopes, smooth) exit. Before you leave, open the treasure chest to get a golden wrench. Go up the anchor chain. Walk up to the quarterdeck. Look at the locket. Put the picture of yourself in over De Cava's picture. Use the wrench to turn the arrow to face the other direction. Press the button.
Look at the voodoo mat. Read the instructions in the top right corner. Put the Fracture card in the first slot, the Journey in the second, and the Curse card in the third. Ring the bell. You will receive a visit from the Marquis De Singe. Talk to him and after a couple of lines you will be able to ask him about the language of giant manatees. Ask him for the book. Threaten him with a hex. There will be no curse, eh? We'll see about that. Look at the mat again. Place the cards in order Journey, Curse, Fracture, and ring the bell. The Marquis, certainly not at all spooked, will bring you the book. Read it. Look at the mat once more. Place the cards in order Curse, Fracture, Journey. Ring the bell and you'll be back in your own body.
Now that you're equipped to talk to manatees, jump into the ocean again. Talk to the male giant manatee. As the game suggests, start with Courtesy and say "I am pleased to meet you". You'll agree to serve as a Cyrano de Bergerac for this poor lovelorn manatee. Talking to the female manatee is somewhat like insult swordfighting: you need to figure out which phrases make suitable responses to her "insults" to please her or amuse her, and in some cases there's more than one acceptable response. (Fortunately, unlike fighting Carla or Rene Rottingham, you only have to do this three times, not five.)
A lot of baggage... Money & Customs - I have nothing to declare
After I devour your bloody heart!?... Hotels & Restaurants - The meal was excellent
Haven't you had enough?... Courtesy - Please repeat that
I detest know-it- alls... Courtesy - I'm sorry, I don't understand
Nobody knows the way to my heart... Getting Around - Do you have a map?
Some lummox buy my love... Money & Customs - How much is it? (or) Do you accept traveler's cheques
What will you say when I rip off your head... Emergencies - Stop, thief! (or) I've been kidnapped
Where will we go... Getting Around - Visit the aquarium (or) Hotels & Restaurants - Room for three nights
Why do I even bother?... Hotels & Restaurants - The television does not work
Why should I give you the time of day... Emergencies - I've lost my watch
Would you like me to dye the ocean depths... Emergencies - Is that blood or ketchup? (or) Courtesies - No, thank you
You males are a bunch of cold fish... Hotels & Restaurants - I prefer it hot and spicy
You're not nervous, are you?... Emergencies - Where is the bathroom?
Well, that was... heartwarming? I guess? But at last the sponge can be yours! Go into the cave. It doesn't give you back your hand, but it does cure your Pox, as promised.
Up top, because you can't keep your mouth shut, you and Morgan will be bunged back in cages like for your stint on the Newlyweds Show. Give Morgan her sword. Try to reach the rope on your own cage. When you climb back in, the cages will shift on the pulley (?) they're apparently hanging on. Talk to Morgan and ask if she can reach the rope on your cage. Going down!
Click on the mast. When Bugeye fires at you, the cannonball will bounce back and destroy his cannon. Quickly load the seahorse head into yours. This tasty morsel will lure the manatee up for a snack, Howler Monkey and all. But just when you thought you were safe, Morgan betrays you to take your whole person in to the Marquis...
To Be Continued
(If you normally quit rather than watch the credits, you might want to watch these.)
Chapter 4: The Trial and Execution of Guybrush Threepwood
Arraigned in Pirate Court
The Marquis may want you dead (eventually), but he's not the only one: the pirates of Flotsam are none too happy with you, and they're here with weapons in hand to... uh... to serve you legal papers and go through due process before feeding you to the crabs and seagulls? Okay. Meanwhile, Morgan is having second thoughts, for all the good that does you now. Watch the scene.
You may note that while the bar fight (including something to do with a cat and with nachos, although you didn't see either) and the counterfeit Porcelain Power Pirate thing both happened in Chapter 1, you probably don't remember ever messing up Hardtack's X, and he doesn't seem so sure of the supposed charges himself. Plead not guilty. Choose to represent yourself in the case. Read through the briefs. In addition to the details of the four charges, you'll find that La Esponja and Elaine's wedding ring have been confiscated from you. In fact, you now have nothing but your hook and the court briefs.
On the Charge of Consonant Abuse (X-Class)
"Court hopes he's not just making things up." Talk to Grindstump. Call a witness and choose Hardtack. Talk to Hardtack. Accuse him three times of lying. And like Bugeye, that's all it takes to break him.
You can call D'Oro and McGee, if you like, to get a little more background for each of their charges, but simply accusing them of lying doesn't get results like with Hardtack. To dismiss a witness, say you have no more questions. Calling yourself to the stand is more amusing than useful, but that said, it is amusing, so I recommend doing it.
Woo-Hoo, Recess!
To accomplish anything else, you'll need to get free movement around the island. Talk to Grindstump and call for a recess. In jail, talk to Hardtack and demand to see your lawyer. He'll, uh, let you in (?) to see yourself. Ask yourself about your case and enjoy hamming it up talking to yourself. Then Hardtack, not being the firmest sea-biscuit in the hold, will yet you-the-lawyer leave the brig.
On the Charge of Felonious Feline Frightening
"If that kitty moves an inch..." Talk to Stan, standing outside of the Keelhauler. Ask what he's doing out here and what he's selling. Ask about the magnetic beard toy. Exit the conversation. Pick up the discarded beard toy. Go up to De Singe's house. Use your hook on the cage on the left side of the door to free Jacques. Go back down to the dock, continue a little further past the house, and you'll spot McGee with his cat. Talk to him. Ask him what he's doing. Exit the conversation. Use the broken beard toy on the food bowl. You're now set to deal with this charge.
On the Charge of Thigh Crimes & Misdemeanors
"Court deems it unlikely that some other mix of fluids could have caused Krebbs' distinctive burn." Go into Club 41. Once De Singe has stormed off, talk to Morgan. Look at the Volcano Shots sign next to Grindstump, and you'll end up with five empty shot glasses and a full one. (Dang, he sure can put away the booze here, can't he? Unless they're not really that alcoholic... or at all...) Look at the painting on the wall. Walk down to the lower level. Walk to the right until you get a top-down view. Use the empty shot glasses on the puddle of wax on the floor under the table with the skull candle on it. Leave Club 41.
Walk to the near end of the dock, where there's a dripping oil lamp. Get some oil with one of the shot glasses (click it on the post holding up the lamps, where there's an object called "oil leak"). (actually I feel like this isn't necessary because you don't need yellow?) Go up to De Singe's house and use a shot glass to get some of the weird oozing fluid from the corner of the house. Go to Crimpdigit's glassworks. Get some molten glass from the puddle in a shot glass. Look at the leg-shaped lamp. Use the mysterious caustic fluid on the lamp.
Look at your inventory. You can see that the lamp has a black patch with a red design that's similar to a skull and crossbones. (Not sure where that came from, since using the caustic liquid only appeared to turn it black, but whatever...) Examine the courtroom sketch: close, but the skull is purple. Combine the leg with the blue hot wax, and bingo. (If you ever mess this up, you can erase and start over by using the cup of molten glass on the leg.) You're now set to deal with this charge.
On the Charge of Counterfeit Collectibles
"Their testimony is only as firm as their last bribe." Go to the jail and talk to Joaquin D'Oro in the right-hand cell. Work through all the dialogue. You'll learn that he gave testimony in exchange for a reduced sentence, and he'd be willing to deal if you can get him a really cool glass eye, specifically one that looks like the red-eyed rage of a Poxed pirate.
Go to the glassblower's. Knock on the front door. Ask about a glass eye. You'll get a "defective" one for free. To get the look D'Oro wants, you'll need to capture it from Grindstump. Go to the courthouse and tell Hardtack you'd like to return to defend your client. Say that you object. While Grindstump is raging, quickly use the glass eye on him. Call a recess again, then once more demand to see your lawyer to get out of the brig. Give the glass eye to D'Oro. He'll hand you his map. You're now set to deal with this charge.
Pirate Court is Now in Session!
Return to court to defend your client again. You can call Krebbs, D'Oro, and McGee in any order you like. Show Krebbs the leg lamp. Show D'Oro the map, as he instructed; as you may recall, this map was originally provided to him by Stan, who now finds himself in a bit of a tight place. For McGee, use electromagnetic Jacques on Miss Prettywhiskers with her tummy full of iron filings. You've now cleared yourself of all the civil charges! But there's still the criminal charge of the Pox. Plead however you like. Say that the Pox isn't your fault. Watch the scene. Seems like Elaine isn't in the mood to cooperate as a character witness. You'll end up in Club 41 where Elaine and Morgan are duking (swording?) it out.
Serving Elaine
Go into the bathroom. When you come out, look at the icky puddle. Get the scrap of paper that's stuck to your boot. Talk to Krebbs. Say "Tell me, did it hurt?" to provoke her into slapping you. This will anger both Elaine and Morgan, who'll come to threaten her at swordpoint, and she'll run off into the bathroom. Now you can get at the bar. Pick up the bag of sugar that Morgan knocked down off the chandelier.
Talk to Grindstump. Order a drink. Choose the Tuna Colada. While he's busy, put the voodoo summons on the dartboard. Grindstump will serve your drink, which will summon Morgan and Elaine back to the bar. Choose the dialogue option, that insults Morgan or compliments Elaine. Morgan will turn to you for a moment, then dodge as Elaine lunges, making her drive her sword into the dartboard through the voodoo summons.
Back in court, talk to Elaine. Hmm, this isn't going as well as you'd hoped. Ask for a second to think about your next move. Go over to the evidence table and pick up La Esponja. Wow, this really isn't going well. But fortunately LeChuck will show up at the dramatically appropriate moment to take the blame on himself and, incidentally, implicate the Voodoo Lady.
The Feast for the Senses
Despite your misgivings, talk to the Voodoo Lady. You'll learn that you need to concoct a Feast of the Senses for La Esponja. Unfold the map. Click on each of the sense organs to learn about the menu: a garish napkin, a stinky smell, a strong taste, something for the "sixth sense", a shocking touch, and a loud belch. It's not made explicit, but you have to complete them in order. Put the menu/map away.
Put on a napkin that's a SIGHT
Stan's jacket seems like a candidate for garish fabric, doesn't it? Ask him about it. Not surprising that he's not willing to sell, though. Leave and go left past the courthouse. You'll see De Singe running off into the jungle. Go through the archway and to the creepy shack way across the island. Poor D'Oro; he can't catch a break. (And besides the fact that you possibly/probably killed McGillicutty by sinking his ship in the last chapter, it sounds like something pretty awful happened to Nipperkin! Although to be fair, "St. Elmo's Fire" is ionized molecules in an electric field, not actual fire.) Notice the moths swarming around the glowing shack remains. Use the leg lamp on the moths.
Click the circle at the bottom left to return to the jungle entrance. Go to the dock and go to Stan's. Use the lamp/moths on Stan. Whoops, not quite. Talk to Stan. Ask about the new souvenirs he's selling, then about the LeChuck doll. Wow, that's a bit bright! And very attractive to moths. Pick up the remains of his jacket from beside the Keelhauler door. Combine it with the sponge.
Gives off a SMELL like stinky feet
While De Singe isn't home seems like the perfect opportunity to take a look around his house, yeah? You'll find the place has been ransacked, and -- oh no, someone's killed Morgan! Welp, little time to mourn. Look at the display cabinet hanging on the wall. (Not really that relevant, now, since you've already dealt with the moths.) Look at the jar on the table in the bottom left (it's hard to see). Look at the picture projected on the wall. Pick the lock on the backroom door with your hook. You'll go in and pick up a bag of severed feet. Grrreat. Leave the lab. Back on the dock, go west a little and McGee is still here with his cat. Ask him about the jungle beast. Leave and head through the archway.
Go to the jungle entrance. Go west one screen and you'll encounter Elaine prowling around. De Singe isn't having any success getting his hands on her, though, so she'll keep. Look at the scrap of paper the skeleton is clutching.
Go north one screen to the wishing well. Dump the sugar in it and some fireflies will come out of the jungle. Dip the sack of severed legs in the sugar water. Go west, then east, to the altar. Put the sugary severed leg on the altar. Return west. The leg is gone, taken by the beast, but now you can follow the fireflies to where it went. Go west twice (watch a brief scene with De Singe and Elaine) and north to the calendar stone. Hmm, the flies are leading off into the forest to the east where there isn't a path. Look at the fireflies and you'll be able to follow the hidden path. To get the lion's paw from the giant pitcher plant, toss it the leg lamp, then take the paw. (I guess this is pulling a lion's paw from a thorn, in a sense...?) Combine the paw with the Sponge.
With TASTE that hits you like a mallet
Return to the jungle entrance and leave the jungle. Go to the dock and go to Club 41. Walk to the far end of the bar and read the sign. (The name of the pepper is a combination of two real-life dangerous foods: fugu, or pufferfish, which is lethally poisonous if not prepared correctly; and bhut jolokia, or ghost pepper, one of the hottest peppers on Earth.) Talk to Grindstump and ask him about the challenge. You'll have to endure putting your tongue on it for 11 seconds. Go ahead, try it! Man, you can't even pick it up with your hands, never mind put your tongue on it. Just using your hook isn't sufficient, here. You need the help of science! Ask to take the challenge again, then go to De Singe's lab. (Hey, wait a second! Morgan's body is gone!) Use the curious helmet hanging from the ceiling. Press the first button on the left. This will make your tongue go numb. Quickly exit the room and run back to Club 41. Use your hook to pick up the pepper. (Be careful, because if you click on any other object, you will shake off your tongue-numbness to describe it, and you'll have to start over.) You'll automatically stick your tongue on it and last the required time to win ownership. Combine the pepper with the Sponge.
To find the SIXTH SENSE, use your map
Leave Club 41 and go to the jungle entrance. Look at your folded map. The landmarks here should mostly look familiar: the altar, the wishing well, the creepy shack, the wind control device. But notice the red idol on the left that has no pathway leading to it, and a path leading west from it down to a question mark. How to get there? This map has some special topographical magic that actually changes the paths through the jungle.
Unfold the top and bottom folds. Fold in all four corners. Fold the top and bottom again. Notice how there's now a (long) connection between where you are at the entrance, and the red idol. Put the map away, and you will see and hear a vibration. Go northwest to the altar, east to the stone block, east to the purple idol, south to the green idol, and north to the red idol. Examine the map again. Unfold it, then refold just the top and bottom so that the question mark under the red idol reappears. Put the map away. Go west. You'll arrive at a different location and hear the Mojo music. This is the Chest of Foreshadowing that you may have seen in the Voodoo Lady's shack back in Chapter 1, mysteriously transported to the middle of the forest! Pick the lock with your hook. You'll automatically pick up the tarot cards inside. Combine the cards with the Sponge.
A TOUCH so shocking it might hurt
Have you noticed that each time you leave Club 41, you get a little shock from touching the door handle after walking across the rug? Return to the jungle entrance. Leave the jungle, go to the dock, and into Club 41. Just walking out again won't be enough, though. This isn't well-clued (and if you ask me, doesn't make a lot of sense since you aren't barefoot), but what you need to do is walk down along the carpet and then back up it to build up a big enough charge before touching the door. You will say "Whoa!" with a little scene of static running up your body if you've set it up right. Now when you exit, you'll get a big enough shock to feed the Sponge.
Belch so loud that all can HEAR
Leave Club 41. As the game leaves no doubt about, the loudest thing on the island is the wind control idol. Watch the scene. Toss the Sponge at the wind device, but it'll bounce off the pyrite parrot and be caught by your hand that's strangely tucked unto De Singe's turban. He'll demonstrate how he's adapted the wind device to molecularize matter and spread it far and wide -- namely, Elaine and her Pox, so that he can use pirates across the Caribbean as a source of Jus de Vie.
At this point, notice that there's some moths fluttering around one of the idol's glowing eyes, and that you're standing next to a bucket of water. Put the sugar you're still carrying into the water, and it will attract fireflies as it did before. Use the fuku jolokia pepper on De Singe and you'll jab it into his eye. (How you were supposed to predict that was exactly what you would do I guess is left as an exercise for the player.) He'll soothe the burn by dunking his head in the water, acquiring a halo of fireflies. Talk to De Singe. Say he'll never get past Elaine's sword. When she lunges for him, she'll cut a cord leading up to the idol's eyes. (I have no idea how you were supposed to predict that outcome of talking to De Singe, either.) The eyes will fade out. In the absence of that light source, the moths will swarm down on the next best thing, the firefly-illuminated De Singe. Enjoy (?) his gruesome death with a touch of Wilhelm scream followed by an Addams Family joke that's a bit jarring against what it just followed.
Throw the Sponge into the wind device again. The Sponge will absorb the Pox through the winds, curing Elaine and everyone else around. Watch as LeChuck shows up and frees you... and kills you... and Elaine tells LeChuck to stick it where the sun don't shine. Which is exactly where you'll be going next...
To Be Continued
Chapter 5: Rise of the Pirate God
Click on the dirt at the base of the gravestone. Do it again. After you slide down the hill, walk to the right. Talk to the ferryman. Work through all the dialogue. You need two coins to pay him. (This traditional lore of two coins laid on the eyes of a dead person is also referred to more subtly in Escape from Monkey Island.) Smear the grave dirt on his nice clean boat. While he's distracted, swipe some money from the tip jar that's sitting on the turnstile. Go over to the Grog machine. Put your "whole eight" (vs. piece of eight, ha ha) in it. Push the change button. Now you have two coins. Give them to the ferryman.
When you arrive at the Crossroads, talk to Galeb. Work through all the dialogue. Note the mention of a spell LeChuck used to return to the land of the living, which is in a chest somewhere, and the hint about a "guide dog" relating to Galeb. Okay, well, that was weird. Get back on the boat. Out of nowhere you now have a souvenir map you can use to get around. You're currently at the Center, and the Gateway is where the graveyard was. Notice that the other three locations are themed to the Three Trials: swordfighting, treasure hunting, and thievery. (What did you expect in the pirate afterlife?)
First, Ye Must Master the Sword
Go to the Swordfight. Follow the stairs up and then climb the mast. Morgan is here, and you're greeted by the ghost of one of the three pirates that were fighting LeChuck for the turtle artifact in Chapter 2. Talk to the swordfighter. Pull the sword out of his head. Use the sword on Morgan. In this (again thankfully brief) rendition of insult swordfighting, you need to choose the response that works as both a rebuke to the swordfighter, and a compliment to Morgan.
I died a failure / You make me want to puke... I bet people say that all the time
I'm useless / A foul smell... In some ways you ARE stronger than me
It's hopeless / I once owned a dog... He must have taught you everything you know (a classic!)
My career as a pirate hunter / Nobody's ever drawn blood... You run THAT fast? (another classic!)
The way I wave this sword / Smaller men quiver... Believe me, you're all woman
On a scale of one to ten / Most cunning pirate... Negative one if that
Morgan will be promoted to the new guardian of this part of the Crossroads. Talk to Morgan. Work through all the dialogue. Go back across the boom, down the stairs, and to the boat.
And the Art of Thievery
Go to the Thieves' Den. You'll be greeted by the thief, who is another of the pirates who were fighting LeChuck. Talk to the thief. Skip the first line, "What are all these things?" (It makes him turn around and invite you to steal something, which you'll do later. If you choose it when you don't mean to, you can walk away and head back to the boat, and he'll turn back around.) Look at the mysterious box on the table, the pile of scrolls, and the sock. Your "friend" the thief will simply let you have the gross crusty sock. Go back to the boat.
And the Quest (Treasure Huntin', Ya Sea Urchin!)
Go to the Treasure Hunt. Talk to the treasure hunter, who is the last of the pirates who were trying to fight LeChuck. Ask how the treasure hunt works; while he's away, take the jeweled anchor. Go over to the sign on the far side of the grounds. Look at the skull and crossbones. You'll grab the bone that you knock down. Go back to the boat.
Go to the Gateway. Get the tip jar. Put money in the Grog machine and press the Grog button. Go to the graveyard mound. Give the bone to the dog. Falling back into your youthful habits, you'll scoop a live dog into your jacket. Return to the Treasure Hunt. Combine Franklin and the sock, then use Franklin on the ground. Hey, hold up, where does he think he's going? Get back in the boat and go to the Center. Seems like Franklin knew his business and there's something to be found here, if only Galeb would move. Wave LeChuck's sock in Galeb's face. You can't open the chest Franklin digs up, but you'll take it. Lastly, give Galeb money to buy your spirit photo.
LeChuck's Spell
Return to the Thieves' Den. Ask the thief to unlock the chest. Hmm, gee, I totally believe him that the chest was empty, how about you? Talk to the thief again. Say "what are all these things" (or ask him to look behind himself, if that's the option you have). Use Franklin on the pile of scrolls. Click on the scrolls to talk to Franklin and tell him to hide the scroll he found. (Yyyyyeah... really don't get how you're supposed to work that one out.) Steal something from one of the various piles, like the peglegs or sextants. (This is necessary to trigger the proper sequence with Franklin. The thief has to be "showing you out", as you whispered to the dog; you can't just leave on your own.) You'll be escorted to the boat, and see Franklin running away. Return to the Treasure Hunt. Use Franklin on the ground and, finally, he'll dig up the spell.
Note the spell components: you need a guide, an anchor, courage, and a sacrifice. As it happens, you're already carrying three of these things. Return to the boat and go to the Center. Put down Franklin, the jeweled anchor, and the Grog. You'll wonder aloud where you might find the sacrifice.
Get in the boat and go to the Swordfight. Walk/climb up and talk to Morgan. Tell her you found a spell. Ask about the only ingredient left, the sacrifice. Exit this level of dialogue and then ask her about the sacrifice again. (This probably seems a little weird since you've actually done all the rest of it already, but hey, game state flags will be game state flags.) Morgan will sacrifice her last shred of her reputation for you. Watch the scene.
Talk to LeChuck. Feel your little pirate heart break as Elaine betrays you and gets honestly really cool new duds. Take the Cutlass of Kaflu. ...Or not. While LeChuck mocks you, try not to think too hard about whether Monkey Island is consistent in its treatment of the interaction of ghosts with physical objects.
For Your Amusement:
After LeChuck throws the cutlass into the mast, before you do anything else, click on the mast. (That's the mast!)
Ghost Unbusters
Now that you've torn open the Crossroads (uh, oops?) you'll find rips to the land of the living at each of the spots other than the Thieves' Den.
Get in the boat and go to the Swordfight. You'll get a little infodump from the Voodoo Lady in the form of talking crabs. You'll learn that possessing your own body isn't as simple as you might have thought, that you may find some of this "spirit gum" that you need in the jail on Flotsam Island, and that it has "ghostly properties".
Walk through the rip. It leads to Club 41, where your body has been pressed into service as a dartboard holder. Unfortunately, you can't just hop back into your body; you need some magical assistance, to wit, De Cava's locket (remember how the Voodoo Lady possessed De Cava and you possessed her?). Talk to Bugeye and ask him about the locket. On the ocean floor, hmm. You can't walk out the door, either, since you can't grab the handle. (So... if you can't touch the door handle, why can't you just walk straight through the door?) So all you can do right now is go back through the rip.
Go down to the boat and go to the Gateway. You'll encounter Galeb, who will tell you that sacrificing your shred of life is the only way to close the rips in the Crossroads, but doing so will trap you here forever. Great.
Walk past the grave mound and go through the rip, which leads to a raft out on the ocean manned by your faithful first mate and map enthusiast, Van Winslow. Talk to him. Jump off the raft into the ocean. Notice the locket trapped up at the top of a long piece of seaweed, where for some reason you can't reach, even though you can clearly swim up to that depth a few feet away by the shipwreck (although you couldn't grab the locket if you could get up there, so whatever). Go to the cavern and talk to Anemone. They won't come out for anyone but sweet Reggie Van Winslow.
Return to the surface and talk to Winslow. Tell him Anemone's hiding out below and suggest that he send a message. After he throws his romantic rock over the side, jump back into the ocean. Approach the cave to talk to Anemone and let them know they've got mail. Notice that their swimming out to get it makes the seaweed where the locket is caught bend further over. Click on the giant clam; it clamps shut. When you walk away from it, it will reopen, releasing a bubble of air. You need to time this so that the air bubble catches the... plastic bag (?) on the end of the seaweed and carries it up to the surface. Watch the seaweed and walk away when it's bent over to its furthest point. If you're successful, you'll float the locket and will automatically return to the surface as well. Use your spirit photo on the locket. Talk to Winslow. Tell him his poem was a hit, then ask him to push the button.
Before you get spirit gum, you only have a limited amount of time in your body before your ghost separates again. So don't waste time talking to Grindstump and Bugeye; just surrender straight off and you'll be hauled to jail. There's some interesting stuff in the right-hand jail cell, such as wads of gum, but you can't reach them. Move the loose brick that's at the back of the cell you're in. You'll find Bugeye's diary, which you'll automatically read. Wait until the possession wears off. Walk through the rip to go back to the Crossroads. Take the boat to the Swordfight and go through the rip to Club 41.
Talk to Bugeye. Ask how he got out of the manatee. Say "You slipped out on the tongue", then "Rode a mer-person to Flotsam". Notice his face when he accuses you of mocking him: a Stinky Tweaking Meanie. Make the same face to actually mock him. (You can see Bugeye in the background, here, to refer to if you're not sure.) Pissed off, he'll try to punch out your intangible spectral lights, hit Grindstump instead, and earn himself a little timeout in jail.
Go through the rip, back to the boat, to the Gateway, and through the rip to the raft. Ask Winslow to push the button. Surrender to be taken to jail. Since Bugeye is now occupying the left-hand cell, you'll be placed in the right-hand cell. Get the mug from the windowsill. Wait until you're depossessed. Note your remarks to Winslow about how they might dress you up in new "party favors". The hint here is that if you have new objects in inventory when you're depossessed, while you can't take them with you as a ghost, they'll still be found with your body.
Go through the rip, to the Swordfight, and to Club 41. (Tedious yet?) Notice that your corpse is now holding the mug you picked up in jail. Talk to Grindstump. Say "BOO!" and make any face you like. He'll toss his dart into the root beer barrels up on the shelf, springing a leak that will fill the mug with root beer. Rip--boat--Gateway--rip--raft--press the button. (Yeah, it's tedious, all right.) You now have a mug of root beer. Surrender and go to jail. Pour the root beer on the wads of gum on the windowsill to reveal the spirit gum. Now you won't be kicked out of your body. Take down the pinup poster and go through the escape tunnel. You'll automatically go to LeChuck's ship. Watch the scene.
Who do you think might know about reversing the Feast of the Senses? Not the Voodoo Lady, actually -- it's Galeb, who has claimed to know a lot about spells. Go to the Gateway. Talk to Galeb and work through the dialogue. You'll learn that you can only close the rips by sacrificing your last shred of life, trapping you here on the other side forever (yikes!), and that to shrink the Sponge, you'll need to put it on a Diet of the Senses. Unlike the Feast, these don't have to be done in any particular order.
A SOUND so petite / Fight the SMELL
Go through the rip to the raft. Huh, Winslow is gone. Take the deodorant. Jump into the ocean. Get the fishnet and return to the surface. Go through the rip. Take the boat to the Treasure Hunt. Dig up an X. A swarm of tiny pyrite parrots will fly out. Carerfully approach the "TREZER" sign (if you get too close, they'll fly away, but you can just dig again). Catch them with the fishnet and put them in the empty jar you have.
A light TOUCH
Go through the rip at the Treasure Hunt, which leads to the Flotsam jungle. You will be greeted by the Voodoo Lady's voice coming out of a dead seagull. Work through all the dialogue. Pick up the seagull feather from the ground in front of the rock where she's lying (it's hard to see). Use your hook on the treasure chest to unlock it. You now have a magic belt buckle that will make people trust you. Go back through the rip (in fact LeChuck may well show up to punch you through it).
Your SIXTH SENSE is bloated
Take the boat to the Thieves' Den. Show the belt buckle to the thief. Click on the secret box. (This won't work until you've seen the Diet of the Senses and know that you need a secret. Before then, you'll get dialogue about how he doesn't know what's in the box because it's a secret.) If you check your inventory, you'll find that you have the box, but have lost the buckle.
Block out the SIGHT / Find a TASTE so bland
Go to the Swordfight and through the rip to Club 41. Take the blindfold that's hanging on the far wall near the narwhal head. Talk to Grindstump and surrender. In jail, take some gum from the stalactite above you. Exit through the tunnel. (Was that better or worse than the "service entrance" of a manatee?) Go through the rip.
Shrinking the Sponge
Take the boat to the Crossroads Center. Use the blindfold, parrots, feather, secret, deodorant, and gum on the Sponge. Watch the scene. (So... after the spell is broken, why can mortal Elaine still hold the cutlass you couldn't even touch?)
Finale
This sequence can be a pain in the butt even when you know what to do, because it involves timing and pixel hunting under duress while LeChuck punches you around the ship (not unlike the endings of Secret, Revenge, and Curse, but in my opinion worse somehow). You only have 5-10 seconds in each location before LeChuck shows up. Even so, sometimes you just have to stand around and wait for him, since you can't move on your own, and sometimes he'll show up before you were done doing what you needed to do and you'll have to go all the way around to try again. Sigh.
You regain control when LeChuck punches you up to the crow's nest for the first time. Use your hook on the mainsail directly below you. Down on deck, talk to Elaine. (Since she's moving, it can be hard to click on her; if you get the skeleton army instead, try again.) You don't have time for conversation, so just tell her to attack LeChuck. After a few seconds, LeChuck will arrive and keelhaul you. While you're underwater, Elaine will distract him for a crucial few seconds, giving you time to grab the ring of keys being held by one of the skeletons under here.
After you stagger out of the cabin, wait for LeChuck to punch you back up to the crow's nest, then wait again for him to throw you back down to the deck. Use the keys on the locked gate. LeChuck will keelhaul you and throw you into the cabin again. Pick up the broken door lying on the deck and use it on the barrel that's just outside the cabin. Wait for LeChuck to punch you back up to the crow's nest again. Use your hook on the rope that leads off to the left.
Look at the rip in the sky (you may have to wait a moment for it to become visible between the sails). Click on the giant cannon that's directly underneath you. Wait for LeChuck to come and hit you. Talk to Elaine and ask her to light the cannon. Stand on the broken door seesaw. LeChuck conveniently appears immediately to jump on the other end, launching you into the cannon barrel. (Where that cooking pot helmet comes from, who knows.)
Morgan stabs LeChuck again, but not to much avail. Like she says, you have to trap him. And what was the only way to close the rip? Use your shred of life on it. It closes around LeChuck, and now Morgan and Elaine can stab him simultaneously.
THE END
...Well, maybe not. Look at the Center. Do you remember how you returned to the land of the living the first time? A guide, an anchor, courage, and a sacrifice, placed in a ring at the center of the crossroads. Look at your inventory and think symbolically for a moment. Elaine is your guide and your anchor; and her ring represents courage and sacrifice. Place it in the Crossroads center. YOU LIVE!
(You'll probably want to stick around after the credits for this one.)
For Your Amusement:
During the finale sequence, look at all your inventory items. Notice your different voice and comments.
Last updated: 9/03/2024